Tuesday, June 28, 2016

Under the Tree

These past couple weeks have been eventful in that I've renewed work on my Sylvaneth army for Warhammer: Age of Sigmar. Also managed to play a big game with 3 vs 4 last weekend at the local game shop. It was fun. The Sylvaneth are a straightforward faction with a large degree of synergy at their core.

Here's a pic of our setup for that game. Despite the big table and various factions involved it was a fast, crazy game. I always wanted to like prior editions of Warhammer, but they were often too convoluted for me to keep up with.


The scenario required two of our four opponents to deploy their forces on the ziggurat in the middle of the board. My team's goal was to prevent these opponents from escaping off the short board edges, while help from both sides trickled in from various points.


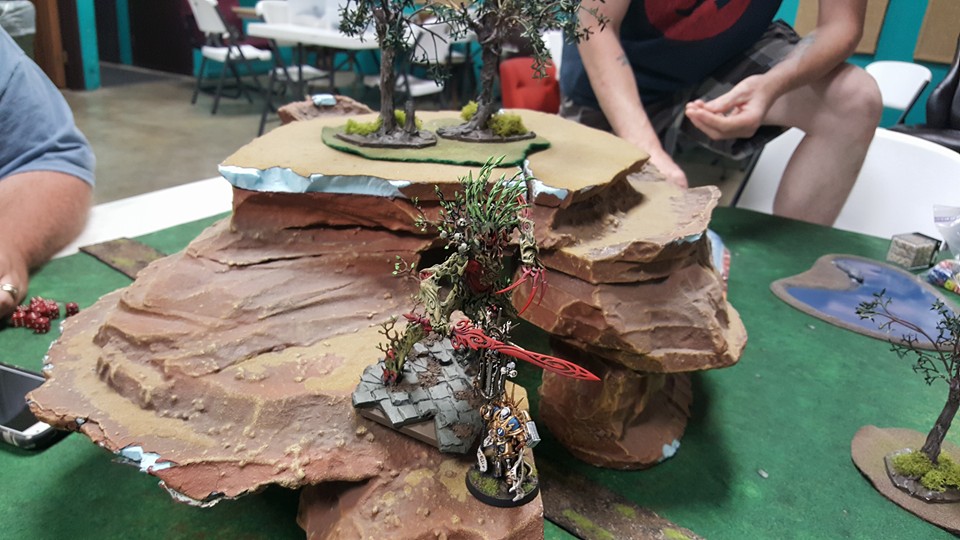
Durthu, the treelord, teleported out of those trees on  the ridge and took out the enemy standard bearer hiding up there. We had a good laugh about it.


Speaking of treelords, here's work on my treelord ancient. Construction was similar to Durthu, but the finished ancient is a very different-looking model.


My only difficulty with this kit is that attaching the talons to the left hand was fiddly, and the fingers project up and outward, so I keep snagging them on things.


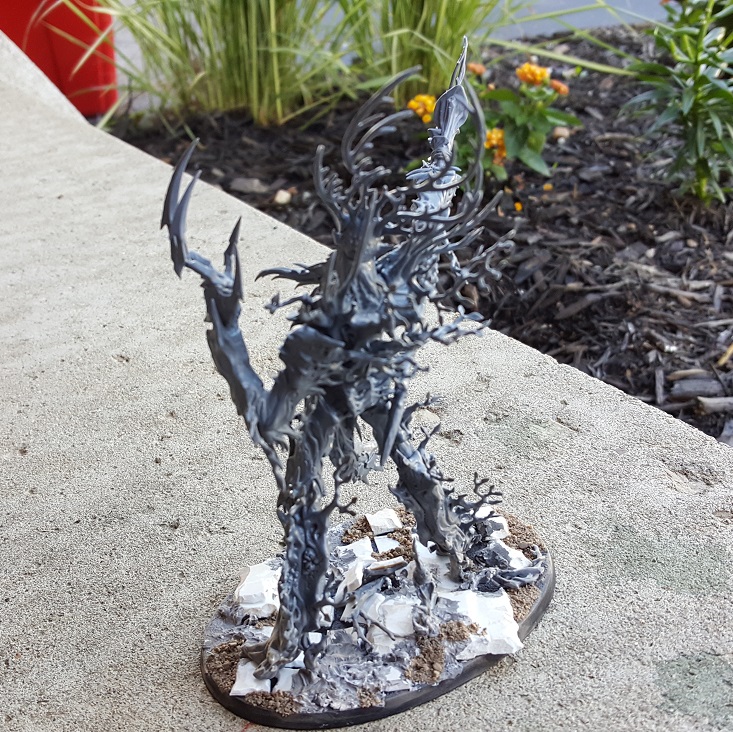
I put a bit of extra time into the base, trying to make it intricate, but subtle. The cobblestones are sheet styrene whose edges I roughed up with an exacto-knife. Then I added some roots and vines pushing out from under some of those.

Next, I applied some spackle with a bit of black acrylic paint mixed in. The paint dyes the spackle and is useful for gauging the level of moisture as it is applied to the base. I find I can push it around with a paintbrush and simulate gnarled roots.


The final step before priming is to apply pvc glue and gravel to fill bald spots on the base.

Thanks for looking.

Monday, June 13, 2016

Let's Take A Look

I'm taking a few days off from titan-building, so lack0fbettername (my arch-nemesis) asked me to post some pics of the whole emperor titan assembled. Seems like a good opportunity to get feedback before jumping into the next phase.


Be advised, there are many parts unpainted, or painted in schemes that clash with the Legio Mortis colors.


One leg painted. One leg not. Still lots of parts all over that could use some revision.


Door-to-door salesmen beware my wrath.


I've noticed here and there some bits and pieces have broken off. Just little stuff, like a couple missiles from a tower launcher.


Here you see my two oldest spawn posing together. That wink says it all: "DEATH TO THE FALSE EMPEROR!"

Saturday, June 11, 2016

One Ugly Mug

Today was nice. The weather's hot, but I managed to get a good start on painting the emperor titan's head. In years past, I've had problems using acrylic paints outdoors. I learned that adding matte medium and a bit more water keeps the paint smooth long enough to work it around on the model's surface.


The kids went to visit their grandparents today, so I had the porch to myself. At first I wasn't feeling motivated to paint the titan. I've been pushing along at a rapid pace, and burnout is no surprise to any of us in the hobby.


After some procrastination, I got started on the base colors for the head.


Legio Mortis scheme. Sloppy here, but will get tighter as things progress. I focused on the right side of the head today, thus nothing to really show you on the left.


I'm happy with the progress, though feeling I could use a few days off from titan work.

Thursday, June 9, 2016

Launch of the Toothship S.S. Deekai

It's been a busy week taking care of the kiddies, and a semblance of upkeep chores around the house. I managed to catch some work on the emperor titan in fits and starts. Usually out on the front porch so I can make a big mess. Most of that time was spent contemplating the next move, staring deep into the titan's cavernous maw. There are some nervous looks from passersby as I sit face-to-face with this thing.

So, the Corvus Assault Head--how to proceed? On paper the ramp was straightforward. I wanted to cram lots of teeth and nurglings in there.


I hit some literal snags with this plan. Digging out a straight tunnel through the pink insulation foam was tough. The strata contained layers of liquid nails, wire, toothpicks, and pvc pipe. I needed to push through all that without weakening or damaging the torso.


 Making it so that the assault ramp slid evenly was more about feel than sight. Add more bemused stares from passersby as I'm now vigorously thrusting a suspicious object in and out of the titan's mouth with a look of deep concentration.


The teeth were the most durable bits, and the hot glue held up pretty well. The nurglings, however, did not. After suffering a few broken horns and claws, I decided to settle on just a few passengers.


The green-stuffing was my favorite part. I just kept to the areas between the outermost teeth as the sculpting boundaries, so the green stuff won't rub on anything. 

Don't forget to floss, kids.


Tuesday, June 7, 2016

Aftermarket Upgrade

Okay, I probably spent way too much time on this next part, but it's funny and weird.

BEHOLD! The Corvus Assault Head:


Wait for it.....


"Blllleeee----"


"-----eeeeeecccchhhhh!"


".... gah?"


"...."


*thunk* "burp!"

Sunday, June 5, 2016

Cry Me a Rivet

I got some helpful feedback from a buddy over on the Warseer* forum, with a recommendation to add riveted plates at each junction of the yellow curved beams. Otherwise it looks like I just glued a bunch of sprues together, which is more or less accurate.


Another thought born from that discussion is the idea of upgrading it to an assault head. Literally, a ramp that shoots out of a titan's face and disgorges chaos troops to assault whatever happens to stand in the titan's path.


So now I want to build one of those for sheer awesomeness. That said, the assault head may have only been an upgrade for chaos warlord titans, and not emperor titans. But I can't say for certain.


I've been spending so much time with this project that I've been having dreams where I'm working on it....


I'm glad my family puts up with me and these projects. It keeps me sane.

Friday, June 3, 2016

Hopeful Fail...ful?

Some more progress today. Green-stuff for the head and armor plates on the chest.  


Tentacles bursting out of the top of the titan's head. There's a tyranid bit hiding in there.


The armor plates will look better once painted. There's weathering that doesn't quite show up here.


Tentacles and boils on the left side of the head.


Should I get rid of this hose?

Wednesday, June 1, 2016

Journey

More work on the emperor titan's head this week.


This part has been a source of much frustration for a while now. I built it to be modular, for ease of transport and storage. The head/torso chunk is the heaviest and largest module. It is difficult to get into a position where I'm comfortable working on it for extended periods of time.

Sometimes it feels like wrestling a monstrous peanut.
 

The core of that issue wasn't really a question of ergonomics. It was more about project burnout, and the real-life difficulties we all face. In short, I wasn't having fun.

 I'm happy to feel enthusiasm for this work again. That scratch-builder's block is gone. I want to finish this thing. Not just for the end result, but for the journey.


Anyway, I've done some head and torso work. The most important thing I hit on was adding armor like the Forgeworld titans, to cover and replace the ramshackle armor shingles from before.


I'm getting supplies today. Sculpting epoxy coming in the mail, and maybe a stop by the hobby shop to pick up some styrene strips and rods for detail work.